ionic升华过程3-angularjs2入门
一。简介
是一款开源库,由维护,用来协助单一页面应用程序运行。 是 1.x 的升级版本,性能上得到显著的提高,能很好的支持 Web 开发组件。 发布于2016年9月份,它是基于ES6来开发的。
中的模块定义标记()
的主要属性如下:
每个的应用都至少有一个模块即根模块。
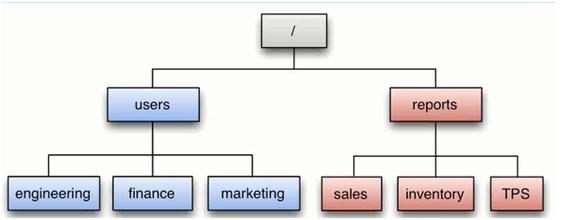
具体架构参考
官方文档参考:
二。安装
安装的客户端
cnpm install -g @angular/cli安装完成后 安装一个ng命令 ng帮助
ng --help
ng new --help 新疆项目
E:\nodejs\my-app>ng new --help
usage: ng new  [options]
options:--collection (-c)Schematics collection to use.--directoryThe directory name to create the workspace in.--dryRun (-d)Run through without making any changes.--force (-f)Forces overwriting of files.--inline-style (-s)Specifies if the style will be in the ts file.--inline-template (-t)Specifies if the template will be in the ts file--new-project-rootThe path where new projects will be created.--prefix (-p)The prefix to apply to generated selectors.--routingGenerates a routing module.--skip-git (-g)Skip initializing a git repository.--skip-installSkip installing dependency packages.--skip-tests (-S)Skip creating spec files.--styleThe file extension to be used for style files.--verbose (-v)Adds more details to output logging.--view-encapsulationSpecifies the view encapsulation strategy.
创建项目 (这里注意 如果直接生成项目 会使用npm去下js模块 非常慢 创建项目 直接生成文件 后面使用cnpm安装)
ng new my-app --skip-install执行结果如下(后面会使用git 没安装不影响)
E:\nodejs>ng new my-app --skip-install
CREATE my-app1/angular.json (3557 bytes)
CREATE my-app1/package.json (1312 bytes)
CREATE my-app1/README.md (1023 bytes)
CREATE my-app1/tsconfig.json (408 bytes)
CREATE my-app1/tslint.json (2805 bytes)
CREATE my-app1/.editorconfig (245 bytes)
CREATE my-app1/.gitignore (503 bytes)
CREATE my-app1/src/favicon.ico (5430 bytes)
CREATE my-app1/src/index.html (293 bytes)
CREATE my-app1/src/main.ts (370 bytes)
CREATE my-app1/src/polyfills.ts (3194 bytes)
CREATE my-app1/src/test.ts (642 bytes)
CREATE my-app1/src/styles.css (80 bytes)
CREATE my-app1/src/browserslist (375 bytes)
CREATE my-app1/src/karma.conf.js (964 bytes)
CREATE my-app1/src/tsconfig.app.json (166 bytes)
CREATE my-app1/src/tsconfig.spec.json (256 bytes)
CREATE my-app1/src/tslint.json (314 bytes)
CREATE my-app1/src/assets/.gitkeep (0 bytes)
CREATE my-app1/src/environments/environment.prod.ts (5
CREATE my-app1/src/environments/environment.ts (642 by
CREATE my-app1/src/app/app.module.ts (314 bytes)
CREATE my-app1/src/app/app.component.html (1141 bytes)
CREATE my-app1/src/app/app.component.spec.ts (998 byte
CREATE my-app1/src/app/app.component.ts (211 bytes)
CREATE my-app1/src/app/app.component.css (0 bytes)
CREATE my-app1/e2e/protractor.conf.js (752 bytes)
CREATE my-app1/e2e/tsconfig.e2e.json (213 bytes)
CREATE my-app1/e2e/src/app.e2e-spec.ts (303 bytes)
CREATE my-app1/e2e/src/app.po.ts (208 bytes)
'git' 不是内部或外部命令,也不是可运行的程序
进入 my-app目录 执行 cnpm (自动根据.json的依赖自动下载包) 时间会略长 之后就可以拷贝修改
cd my-app && cnpm install打开静态web服务 并使用浏览器打开测试
ng serve --open自动打开浏览器访问(f12切换成手机模式)
http://localhost:4200/
使用打开 my-app目录 编辑即可
四。案例
为了快速进入,了解开发过程,建议完整模拟官方的 英雄之旅案例()
实现动态图:
大概理解一下 一个项目分为很多模块( 有个主模块app.) 访问的首页是index.html
每个模块下有多个控件 默认() 控件由模板,样式,数据组成最后生成html 比如控件的注解
@Component({selector: 'app-root',//控件的代码展示在父组件的哪个位置 用各种css选择器templateUrl: './app.component.html',//控件指定的模板的位置styleUrls: ['./app.component.css']//控件指定的样式的位置})表示将来模板的代码 生成在父容器下 是app-root(标签选择器)中 查看 index.html
将来比如有其他控件 显示在 中 只需要在 中添加一个标签 制定选择器到这个标签即可
1》了解控件
生成一个英雄的控件
C:\tttt\my-app>ng generate component heroes
CREATE src/app/heroes/heroes.component.html (25 bytes)
CREATE src/app/heroes/heroes.component.spec.ts (628 bytes)
CREATE src/app/heroes/heroes.component.ts (269 bytes)
CREATE src/app/heroes/heroes.component.css (0 bytes)
UPDATE src/app/app.module.ts (396 bytes)
自动在app目录下创建目录 生成控件
修改 默认主控件 将标题数据修改为 :
title = '英雄之旅';将.html只留下标题和一个父标签用于插入 hero控件内容
{{ title }}!
ng serve自动监控 文件修改,开启一次不用关了 直接访问
ebc39fef663b2f05bc6de1b0631136c3
分析一下 生成的代码结构 查看控件文件
import { Component, OnInit } from '@angular/core';@Component({selector: 'app-heroes',//选择之前app.html中定义的那个标签名 templateUrl: './heroes.component.html',styleUrls: ['./heroes.component.css']
})
export class HeroesComponent implements OnInit {constructor() { }ngOnInit() {  //控件被实例化 自动调用}}
因为新的控件 生成在app这个模块中 打开模块文件
import { BrowserModule } from '@angular/platform-browser';
import { NgModule } from '@angular/core';import { AppComponent } from './app.component';
//导入了英雄模块 引入了类
import { HeroesComponent } from './heroes/heroes.component';@NgModule({declarations: [AppComponent,HeroesComponent //不定义这个控件 如果app.component.html加了标签 就会报错],imports: [BrowserModule],providers: [],bootstrap: [AppComponent]
})
export class AppModule { }
2》编辑英雄数据
因为英雄可能存在多个属性 比如id 和name 所以可以目录定义一个英雄的class
export class Hero{id:number;name:string;
}
在控件中.ts定义该hero的实际数据
import { Hero } from './hero';//导入Hero类
export class HeroesComponent implements OnInit {hero:Hero={id:1,name:"zs"};
//添加一个数据 数据+模板=html
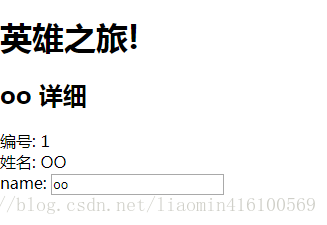
}显示英雄数据 并且将数据和编辑器绑定
{{hero.name}} 详细
编号: {{hero.id}}
姓名: {{hero.name|uppercase}}
[()]是绑定控件模型数据 该功能位于控件中 模块中(app..ts)引入 并导入
import { FormsModule } from '@angular/forms';
imports: [BrowserModule,FormsModule],
最终效果(编辑文本框名字都跟着改变):
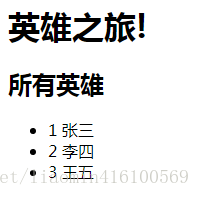
3》显示多个英雄数据
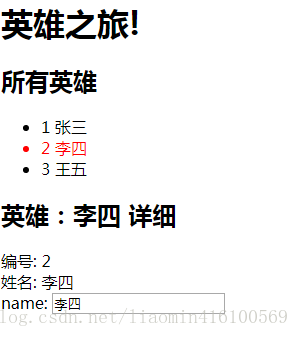
显示多个英雄数据 并且点击某个英雄 自动编辑该英雄
控件中.ts定义数组的Hero
heros:Hero[]=[{id:1,name:"张三"},{id:2,name:"李四"},{id:1,name:"王五"}];修改模板.html 展示所有的数据
所有英雄
- {{hero.id}} {{hero.name}}
英雄:{{selectedHero.name}} 详细
编号: {{selectedHero.id}}
姓名: {{selectedHero.name|uppercase}}
.ts添加事件和选中的hero
selectedHero: Hero;onSelect(hero: Hero): void {this.selectedHero = hero;}最终效果 初始化
点击任意一个英雄(文本框修改 列表数据跟着修改)
4》将英雄数据放入
之前将数据直接定义在中 组建应该更加关注的view层 负责读取数据
生成 文件 hero..ts
import { Injectable } from '@angular/core';@Injectable({providedIn: 'root'
})
export class HeroService {constructor() { }
}
注解表示 将它添加到提供者中 root表示随处都可以装配
修改源代码 将数据放在中 将来发起http连接
import { Injectable } from '@angular/core';
import { Hero } from './heroes/hero';
@Injectable({providedIn: 'root'
})
export class HeroService {heros:Hero[]=[{id:1,name:"张三"},{id:2,name:"李四"},{id:3,name:"王五"}];getHeroes():Hero[]{return this.heros;}constructor() { }
}
修改控件类 注入
import { Component, OnInit } from '@angular/core';
import { Hero } from './hero';
import { HeroService } from '../hero.service';
@Component({selector: 'app-heroes',templateUrl: './heroes.component.html',styleUrls: ['./heroes.component.css']
})
export class HeroesComponent implements OnInit {heros:Hero[];selectedHero: Hero;onSelect(hero: Hero): void {this.selectedHero = hero;}constructor(private  helloService:HeroService) { }//注入servicengOnInit() {this.heros=this.helloService.getHeroes();//初始化时调用service获取数据注入到控件属性中}}
其中还有关于同步异步 路由 http相关参考官方文档(后续文章给出)
关于所有模板中 事件 属性 样式等设置参考