Android中使用DownloadManager下载并安装apk
是一个很好用的网络框架,但是 不适合用来下载大的数据文件。因为 会保持在解析的过程中所有的响应。对于下载大量的数据操作,建议我们使用 。
类介绍
官方文档上对是这样介绍的:
The is a that long- HTTP . may that a URI be to a file. The will the in the , care of HTTP and after or and . of this class be ice()by ICE. Apps that this API a when the user on a in a or from the UI. Note that the must use this class.
简而言之:
相关类
包含两个内部类:
.(主要用于发起一个下载请求):
( , value):添加http的
es(int flags):设置允许的网络类型
(Uri uri):自定义下载目录
ility(int ):设置的显示情况
( title):设置中显示的标题
.Query(主要用于查询下载信息):
(long… ids):添加下载的id,便于查询对应的下载情况 应用下载更新 实例实现后台更新
Step 1:在中通过启动,并传递参数。
.java:
Intent serviceIntent = new Intent(MainActivity.this,DownloadService.class);
//将下载地址url放入intent中serviceIntent.setData(Uri.parse(url));startService(serviceIntent);
Step 2:在中获得url,通过下载应用
.java:
public class DownloadService extends IntentService {private String TAG = "DownloadService";public static final String BROADCAST_ACTION ="com.example.android.threadsample.BROADCAST";public static final String EXTENDED_DATA_STATUS ="com.example.android.threadsample.STATUS";private LocalBroadcastManager mLocalBroadcastManager;public DownloadService() {super("DownloadService");}@Overrideprotected void onHandleIntent(Intent intent) {//获取下载地址String url = intent.getDataString();Log.i(TAG,url);//获取DownloadManager对象DownloadManager downloadManager = (DownloadManager) getSystemService(Context.DOWNLOAD_SERVICE);DownloadManager.Request request = new DownloadManager.Request(Uri.parse(url));//指定APK缓存路径和应用名称,可在SD卡/Android/data/包名/file/Download文件夹中查看request.setDestinationInExternalFilesDir(this, Environment.DIRECTORY_DOWNLOADS, "mydown.app");//设置网络下载环境为wifirequest.setAllowedNetworkTypes(DownloadManager.Request.NETWORK_WIFI);//设置显示通知栏,下载完成后通知栏自动消失request.setNotificationVisibility(DownloadManager.Request.VISIBILITY_VISIBLE);//设置通知栏标题request.setTitle("下载");request.setDescription("应用正在下载");request.setAllowedOverRoaming(false);//获得唯一下载idlong requestId = downloadManager.enqueue(request);//将id放进IntentIntent localIntent = new Intent(BROADCAST_ACTION);localIntent.putExtra(EXTENDED_DATA_STATUS,requestId);//查询下载信息DownloadManager.Query query=new DownloadManager.Query();query.setFilterById(requestId);try{boolean isGoging=true;while(isGoging){Cursor cursor = downloadManager.query(query);if (cursor != null && cursor.moveToFirst()) {int status = cursor.getInt(cursor.getColumnIndex(DownloadManager.COLUMN_STATUS));switch(status){//如果下载状态为成功 case DownloadManager.STATUS_SUCCESSFUL:isGoging=false;//调用LocalBroadcastManager.sendBroadcast将intent传递回去mLocalBroadcastManager = LocalBroadcastManager.getInstance(this);mLocalBroadcastManager.sendBroadcast(localIntent);break;}}if(cursor!=null){cursor.close();}}}catch(Exception e){e.printStackTrace();}}
}
Step 3:中注册,监听广播,更新UI。
.java:
注册广播的方法(动态注册):
private void regist() {IntentFilter intentFilter = new IntentFilter(DownloadService.BROADCAST_ACTION);intentFilter.addCategory(Intent.CATEGORY_DEFAULT);LocalBroadcastManager.getInstance(this).registerReceiver(receiver, intentFilter);}接受到广播,处理传递过来的数据,下载完成,自动安装应用:
private class MyReceiver extends BroadcastReceiver {@Overridepublic void onReceive(Context context, Intent intent) {String data = intent.getStringExtra(DownloadService.EXTENDED_DATA_STATUS);Log.i("test", data);long id = intent.getLongExtra(DownloadManager.EXTRA_DOWNLOAD_ID, -1);Toast.makeText(MainActivity.this, "编号:"+id+"的下载任务已经完成!", Toast.LENGTH_SHORT).show();intent = new Intent(Intent.ACTION_VIEW);intent.setFlags(Intent.FLAG_ACTIVITY_NEW_TASK);intent.setDataAndType(Uri.fromFile(new File(Environment.getExternalStorageDirectory() + "/myApp.apk")),"application/vnd.android.package-archive");startActivity(intent);}}最后取消注册广播:
protected void onDestroy() {super.onDestroy();cancel();LocalBroadcastManager.getInstance(this).unregisterReceiver(receiver);}最后别忘了加上权限:
最终效果图如下:

放上.java的完整代码:
public class MainActivity extends AppCompatActivity implements View.OnClickListener{MyReceiver receiver = new MyReceiver();private Button myselfButton;private String url = "http://172.30.18.222:8080/com.android36kr.app_16101017.apk";private DownloadDialog downloadDialog;@Overrideprotected void onCreate(Bundle savedInstanceState) {super.onCreate(savedInstanceState);setContentView(R.layout.activity_main);regist();initView();}private void initView() {myselfButton = (Button)this.findViewById(R.id.myself_update);myselfButton.setOnClickListener(this);}private void regist() {IntentFilter intentFilter = new IntentFilter(DownloadService.BROADCAST_ACTION);intentFilter.addCategory(Intent.CATEGORY_DEFAULT);LocalBroadcastManager.getInstance(this).registerReceiver(receiver, intentFilter);}public void download(){showDialog();Intent myserviceIntent = new Intent(MainActivity.this,MyDownloadService.class);myserviceIntent.setData(Uri.parse(url));startService(myserviceIntent);}  @Overridepublic void onClick(View v) {switch(v.getId()){case R.id.myself_update:Intent serviceIntent = new Intent(MainActivity.this,DownloadService.class);serviceIntent.setData(Uri.parse(url));startService(serviceIntent);break;}}private class MyReceiver extends BroadcastReceiver {@Overridepublic void onReceive(Context context, Intent intent) {String data = intent.getStringExtra(DownloadService.EXTENDED_DATA_STATUS);Log.i("test", data);long id = intent.getLongExtra(DownloadManager.EXTRA_DOWNLOAD_ID, -1);Toast.makeText(MainActivity.this, "编号:"+id+"的下载任务已经完成!", Toast.LENGTH_SHORT).show();intent = new Intent(Intent.ACTION_VIEW);intent.setFlags(Intent.FLAG_ACTIVITY_NEW_TASK);intent.setDataAndType(Uri.fromFile(new File(Environment.getExternalStorageDirectory() + "/myApp.apk")),"application/vnd.android.package-archive");startActivity(intent);}}protected void onDestroy() {super.onDestroy();cancel();LocalBroadcastManager.getInstance(this).unregisterReceiver(receiver);}
}
实例实现强制更新:
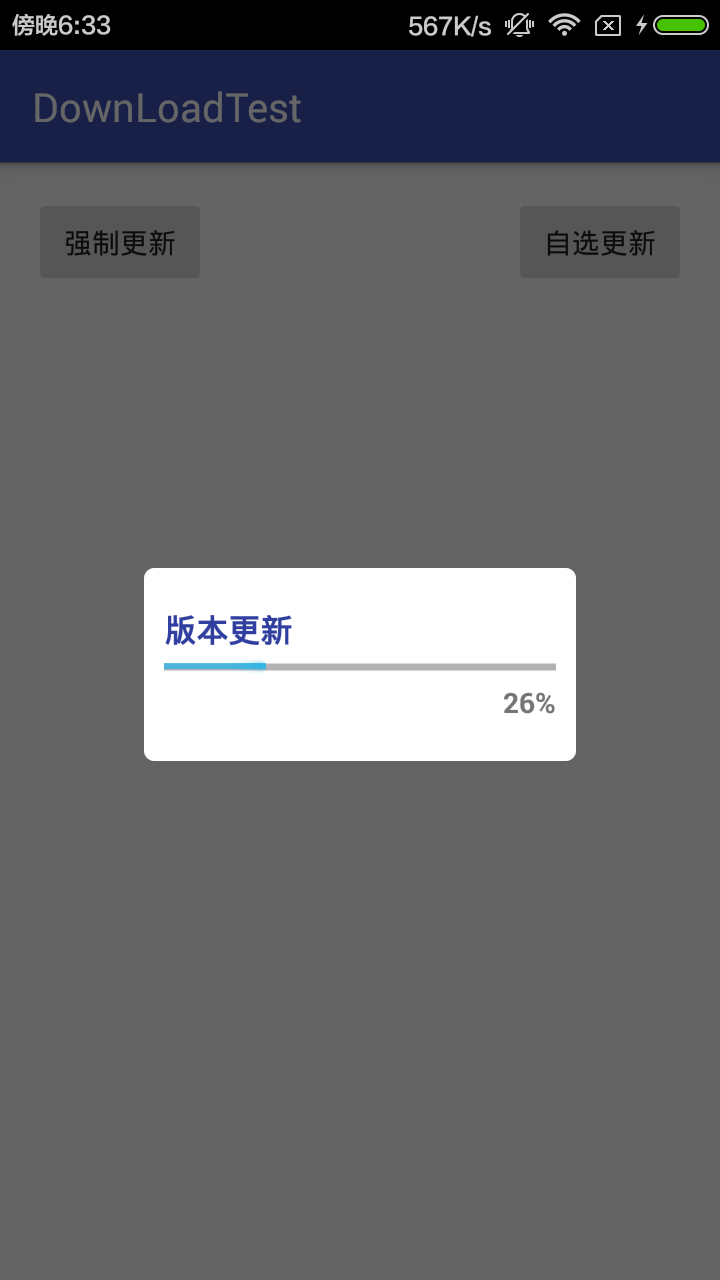
Step 1:创建一个不可取消的(按back键不能取消,按弹窗外不可取消)
首先我们设置的 布局文件,.xml:
进度条显示下载进度,显示下载百分比。
然后自定义一个,将布局文件设置进去,.java :
public class DownloadDialog extends AlertDialog {private Context mContext;private TextView mTextView;private ProgressBar mProgressBar;private View view;protected DownloadDialog(Context context) {super(context);this.mContext = context;}@Overrideprotected void onCreate(Bundle savedInstanceState) {super.onCreate(savedInstanceState);//设置对话框样式setStyle();//初始化控件initView();}private void initView() {view = View.inflate(mContext,R.layout.dwonlaod_dialog,null);mTextView = (TextView)view.findViewById(R.id.mTextView);mProgressBar = (ProgressBar)view.findViewById(R.id.mProgressBar);setContentView(view);}private void setStyle() {//设置对话框不可取消this.setCancelable(false);//设置触摸对话框外面不可取消this.setCanceledOnTouchOutside(false);DisplayMetrics displaymetrics = new DisplayMetrics();getWindow().getWindowManager().getDefaultDisplay().getMetrics(displaymetrics);//获得应用窗口大小WindowManager.LayoutParams layoutParams = this.getWindow().getAttributes();//设置对话框居中显示layoutParams.gravity = Gravity.CENTER;//设置对话框宽度为屏幕的3/5layoutParams.width = (displaymetrics.widthPixels/5)*3;}//设置进度条public void setProgress(int progress){mTextView.setText(progress+"%");mProgressBar.setProgress(progress);}
}
创建显示对话框,取消对话框的方法, :
private void showDialog() {if(downloadDialog==null){downloadDialog = new DownloadDialog(this);}if(!downloadDialog.isShowing()){downloadDialog.show();}}private void canceledDialog() {if(downloadDialog!=null&&downloadDialog.isShowing()){downloadDialog.dismiss();}}Step 2:通过开始下载
创建一个方法用于下载应用:
private void download() {showDialog();//最好是用单线程池,或者intentServicenew Thread(new DownLoadRunnable(this,url, handler)).start();}接下来看看在中的具体处理方法:
public class DownLoadRunnable implements Runnable {private String url;private Handler handler;private Context mContext;public DownLoadRunnable(Context context, String url, Handler handler) {this.mContext = context;this.url = url;this.handler = handler;}@Overridepublic void run() {//设置线程优先级为后台,这样当多个线程并发后很多无关紧要的线程分配的CPU时间将会减少,有利于主线程的处理   Process.setThreadPriority(Process.THREAD_PRIORITY_BACKGROUND);//具体下载方法startDownload();}private long startDownload() {//获得DownloadManager对象DownloadManager downloadManager=(DownloadManager) mContext.getSystemService(Context.DOWNLOAD_SERVICE);//获得下载id,这是下载任务生成时的唯一id,可通过此id获得下载信息long requestId= downloadManager.enqueue(CreateRequest(url));//查询下载信息方法queryDownloadProgress(requestId,downloadManager);return  requestId;}private void queryDownloadProgress(long requestId, DownloadManager downloadManager) {DownloadManager.Query query=new DownloadManager.Query();//根据任务编号id查询下载任务信息query.setFilterById(requestId);try {boolean isGoging=true;while (isGoging) {Cursor cursor = downloadManager.query(query);if (cursor != null && cursor.moveToFirst()) {//获得下载状态int state = cursor.getInt(cursor.getColumnIndex(DownloadManager.COLUMN_STATUS));switch (state) {case DownloadManager.STATUS_SUCCESSFUL://下载成功isGoging=false;handler.obtainMessage(downloadManager.STATUS_SUCCESSFUL).sendToTarget();//发送到主线程,更新uibreak;case DownloadManager.STATUS_FAILED://下载失败isGoging=false;handler.obtainMessage(downloadManager.STATUS_FAILED).sendToTarget();//发送到主线程,更新uibreak;case DownloadManager.STATUS_RUNNING://下载中/*** 计算下载下载率;*/int totalSize = cursor.getInt(cursor.getColumnIndex(DownloadManager.COLUMN_TOTAL_SIZE_BYTES));int currentSize = cursor.getInt(cursor.getColumnIndex(DownloadManager.COLUMN_BYTES_DOWNLOADED_SO_FAR));int progress = (int) (((float) currentSize) / ((float) totalSize) * 100);handler.obtainMessage(downloadManager.STATUS_RUNNING, progress).sendToTarget();//发送到主线程,更新uibreak;case DownloadManager.STATUS_PAUSED://下载停止handler.obtainMessage(DownloadManager.STATUS_PAUSED).sendToTarget();break;case DownloadManager.STATUS_PENDING://准备下载handler.obtainMessage(DownloadManager.STATUS_PENDING).sendToTarget();break;}}if(cursor!=null){cursor.close();}}}catch (Exception e){e.printStackTrace();}}private DownloadManager.Request CreateRequest(String url) {DownloadManager.Request  request=new DownloadManager.Request(Uri.parse(url));request.setNotificationVisibility(DownloadManager.Request.VISIBILITY_HIDDEN);// 隐藏notificationrequest.setAllowedNetworkTypes(request.NETWORK_WIFI);//设置下载网络环境为wifirequest.setDestinationInExternalFilesDir(mContext, Environment.DIRECTORY_DOWNLOADS,"MyApp.app");//指定apk缓存路径,默认是在SD卡中的Download文件夹return  request;}
}
Step 3:在里中更新下载状态(回调主线程中,更新UI)
在主线程中通过获取,并回调方法处理信息,更新UI,.java:
Handler handler = new Handler(){@Overridepublic void handleMessage(Message msg) {switch (msg.what){case DownloadManager.STATUS_SUCCESSFUL:downloadDialog.setProgress(100);canceledDialog();Toast.makeText(MainActivity.this, "下载任务已经完成!", Toast.LENGTH_SHORT).show();break;case DownloadManager.STATUS_RUNNING://int progress = (int) msg.obj;downloadDialog.setProgress((int) msg.obj);//canceledDialog();break;case DownloadManager.STATUS_FAILED:canceledDialog();break;case DownloadManager.STATUS_PENDING:showDialog();break;}}};Step 4:下载完成后进行安装(静态注册广播接收器,实现安装功能)
.xml:
接受广播并自行安装应用,.java:
public class InstallApkBroadcast extends BroadcastReceiver {@Overridepublic void onReceive(Context context, Intent intent) {install(context);}private void install(Context context) {Intent installintent = new Intent();installintent.setAction(Intent.ACTION_VIEW);// 在Boradcast中启动活动需要添加Intent.FLAG_ACTIVITY_NEW_TASKinstallintent.setFlags(Intent.FLAG_ACTIVITY_NEW_TASK);installintent.setDataAndType(Uri.fromFile(new File(Environment.getExternalStorageDirectory() + "/myApp.apk")),"application/vnd.android.package-archive");//存储位置为Android/data/包名/file/Download文件夹context.startActivity(installintent);}
}
最后别忘了加上权限:
最终效果为:
这里放上的完整代码:
.java:
public class MainActivity extends AppCompatActivity {private Button force_button;private DownloadDialog downloadDialog;private DownloadManager mDownloadManager;private String url = "http://172.30.18.222:8080/lanota.apk";Handler handler = new Handler(){@Overridepublic void handleMessage(Message msg) {switch (msg.what){case DownloadManager.STATUS_SUCCESSFUL:downloadDialog.setProgress(100);canceledDialog();Toast.makeText(MainActivity.this, "下载任务已经完成!", Toast.LENGTH_SHORT).show();break;case DownloadManager.STATUS_RUNNING://int progress = (int) msg.obj;downloadDialog.setProgress((int) msg.obj);//canceledDialog();break;case DownloadManager.STATUS_FAILED:canceledDialog();break;case DownloadManager.STATUS_PENDING:showDialog();break;}}};@Overrideprotected void onCreate(Bundle savedInstanceState) {super.onCreate(savedInstanceState);setContentView(R.layout.activity_main);force_button = (Button)this.findViewById(R.id.force_button);force_button.setOnClickListener(new View.OnClickListener() {@Overridepublic void onClick(View v) {download();}});}private void download() {showDialog();//最好是用单线程池,或者intentService取代new Thread(new DownLoadRunnable(this,url, handler)).start();}private void showDialog() {if(downloadDialog==null){downloadDialog = new DownloadDialog(this);}if(!downloadDialog.isShowing()){downloadDialog.show();}}private void canceledDialog() {if(downloadDialog!=null&&downloadDialog.isShowing()){downloadDialog.dismiss();}}
}