SpringBoot中使用Spring Security实现权限控制
基本介绍
这里就不对 进行过多的介绍了,具体的可以参考官方文档
我就只说下核心功能:
基本环境搭建
这里我们以作为项目的基本框架,我这里使用的是maven的方式来进行的包管理,所以这里先给出集成 的方式
org.springframework.boot spring-boot-starter-security 然后建立一个Web层请求接口
@RestController
@RequestMapping("/user")
public class UserController {@GetMappingpublic String getUsers() {       return "Hello Spring Security";}
}
接下来可以直接进行项目的运行,并进行接口的调用看看效果了。
通过网页的调用
我们首先通过浏览器进行接口的调用,直接访问:8080/user,如果接口能正常访问,那么应该显示“Hello ”。
但是我们是没法正常访问的,出现了下图的身份验证输入框
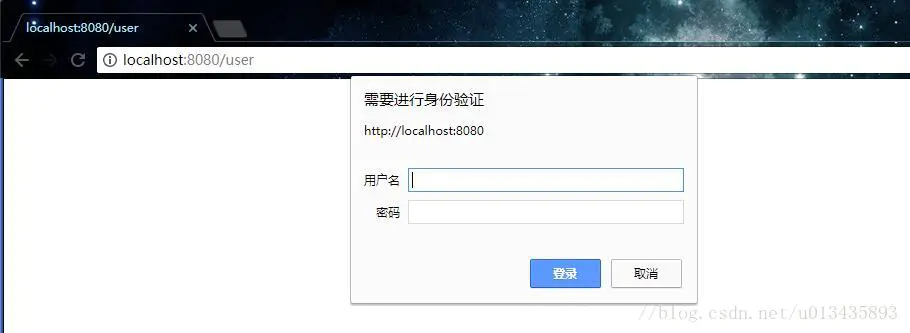
image.png
这是因为在中,默认的 就是生效了的,此时的接口都是被保护的,我们需要通过验证才能正常的访问。 提供了一个默认的用户,用户名是user,而密码则是启动项目的时候自动生成的。
我们查看项目启动的日志,会发现如下的一段Log
Using : -9fbe-4993-8566-
当然你看到的肯定和我是不一样的,我们直接用user和启动日志中的密码进行登录。
登录成功后,就跳转到了接口正常调用的页面了。
刚才看到的登录框是是框架自己提供的,被称为。显示它不是我们产品上想要的,我们前端一般是通过表单提交的方式进行用户登录验证的,所以我们就需要自定义自己的认证逻辑了。
改造1 使用页面表单登录 前端写一个登陆页面(使用 模板引擎),login.html文件:
此处的/form对应配置的跳转链接
loginProcessingUrl("/form")
home
写一个方法指向该登陆页面,不能使用@和@,否则就返回字符串了。
@RequestMapping("/login")public String userLogin() {return "login";}
还需要配置上:
index的()是为了模拟登陆,不然会一直跳转登陆
# 定位模板的目录
spring.thymeleaf.prefix=classpath:/templates/
# 给返回的页面添加后缀名
spring.thymeleaf.suffix=.html
spring.thymeleaf.content-type=text/html
spring.thymeleaf.mode=HTML5
添加一个类 继承
重写方法,并加上@ 和@ 2个注解。
@Configuration
@EnableWebSecurity
public class SecurityConfig extends WebSecurityConfigurerAdapter {@Overrideprotected void configure(HttpSecurity http) throws Exception {http.authorizeRequests().antMatchers("/css/**", "/index").permitAll()       .antMatchers("/user/**").hasRole("USER")            .and().formLogin().and().csrf().disable() //关闭CSRF.formLogin().loginPage("/login").loginProcessingUrl("/form").defaultSuccessUrl("/index") //成功登陆后跳转页面.failureUrl("/loginError").permitAll(); }}
与/ css / **和/ index匹配的请求是完全可访问的
与/ user / **匹配的请求要求用户进行身份验证,并且必须与USER角色相关联
使用自定义登录页面和失败URL启用基于表单的身份验证
("/login")表示登录时跳转的页面,因为登录页面我们不需要登录认证,所以我们需要添加 () 方法。
login-page 自定义登录页url,默认为/login
login--url 登录请求拦截的url,也就是form表单提交时指定的
=表示登录出错的页面,我们可以简单写个提示:如 用户名或密码错误。
.csrf().() 说明: 默认是开启CSRF的,所以需要请求中包含CSRF的token信息,这里不添加这段代码的话会出现异常,加上的话可以关闭csrf(关闭后有安全漏洞)。
测试:
1、输入网址::8081/index,自动跳转到::8081/login,返回登陆页面
2、输入账号密码:错误的话返回:8081/,登陆失败页面
正确的话:返回:8081/index,登陆成功页面
改造2、自定义用户名和密码
很显然,这样改造之后,虽然登录页面是好看了,但还远远不能满足我们的应用需求,所以第二步,我们改造自定义的用户名和密码。
自定义用户名和密码有2种方式,一种是在代码中写死,这也是官方的demo,另一种是使用数据库
首先是第一种:如
@Autowiredpublic void configureGlobal(AuthenticationManagerBuilder auth) throws Exception {auth.inMemoryAuthentication().withUser("user").password("password").roles("USER");}
我们也照样,这是把用户名改成 admin 密码改成 roles是该用户的角色,我们后面再细说。
@Autowiredpublic void configureGlobal(AuthenticationManagerBuilder auth) throws Exception {auth.inMemoryAuthentication().withUser("admin").password("123456").roles("USER");}
还有种方法 就是 重写 另外一种( auth) 方法,这个和上面那个方法的作用是一样的。选其一就可。
@Overrideprotected void configure(AuthenticationManagerBuilder auth) throws Exception {// TODO Auto-generated method stubauth.inMemoryAuthentication().withUser("admin").password("123456").roles("USER").and().withUser("test").password("test123").roles("ADMIN");}
程序运行起来,这时用我们自己的用户名和密码 输入 admin 和 就可以了。
你也可以多几个用户,就多几个即可。
.and().("test").("").roles("ADMIN");
这样我们就有了一个用户名为test,密码为的用户了。
第一种的只是让我们体验了一下 而已,我们接下来就要提供自定义的用户认证机制及处理过程。
在讲这个之前,我们需要知道 的原理, 的原理就是使用很多的拦截器对URL进行拦截,以此来管理登录验证和用户权限验证。
用户登陆,会被拦截,调用r的实现,而且r会调用来获取用户验证信息(不同的调用的服务不同,因为这些信息可以是在数据库上,可以是在LDAP服务器上,可以是xml配置文件上等),如果验证通过后会将用户的权限信息封装一个User放到的全局缓存r中,以备后面访问资源时使用。
所以我们要自定义用户的校验机制的话,我们只要实现自己的er就可以了。在用er 这个之前,我们需要提供一个获取用户信息的服务,实现 接口
用户名密码->((未认证) -> r ->er->->->(已认证)
了解了这个原理之后,我们就开始写代码
接口
第一步:我们定义自己的用户信息类 继承接口
代码如下:
public class User implements UserDetails {private Long id;private String username;private String password;private String nickname;private boolean enabled;private List roles;private String email;private String userface;private Timestamp regTime;@Override@JsonIgnorepublic boolean isAccountNonExpired() { // 帐户是否过期return true;}@Override@JsonIgnorepublic boolean isAccountNonLocked() { // 帐户是否被冻结return true;}// 帐户密码是否过期,一般有的密码要求性高的系统会使用到,比较每隔一段时间就要求用户重置密码@Override@JsonIgnorepublic boolean isCredentialsNonExpired() { return true;}@Overridepublic boolean isEnabled() {  // 帐号是否可用return enabled;}public void setEnabled(boolean enabled) {this.enabled = enabled;}@Override@JsonIgnorepublic List getAuthorities() {List authorities = new ArrayList<>();for (Role role : roles) {authorities.add(new SimpleGrantedAuthority("ROLE_" + role.getName()));}return authorities;}//....getter setter
}
接口
然后实现第2个类 来返回这个的对象实例
@Component
public class MyUserDetailsService implements UserDetailsService {@Overridepublic UserDetails loadUserByUsername(String username) throws UsernameNotFoundException {//这里可以可以通过username(登录时输入的用户名)然后到数据库中找到对应的用户信息,并构建成我们自己的UserInfo来返回。           //这里可以通过数据库来查找到实际的用户信息,这里我们先模拟下,后续我们用数据库来实现if(username.equals("admin")) {  //假设返回的用户信息如下;User userInfo=new User();userInfo.setUsername("admin");userInfo.setPassword("123456");Role role = new Role(1L,"admin");List list = new ArrayList();list.add(role);userInfo.setRoles(list);return userInfo;                             }           return null;                       }
}
到这里为止,我们自己定义的类和从数据库中返回具体的用户信息已经实现,接下来我们要实现的,我们自己的 er
er接口
新建类 ider 继承er
完整的代码如下:
@Component
public class MyAuthenticationProvider implements AuthenticationProvider {/*** 注入我们自己定义的用户信息获取对象*/@Autowiredprivate UserDetailsService userDetailService;@Overridepublic Authentication authenticate(Authentication authentication) throws AuthenticationException {// TODO Auto-generated method stubString userName = authentication.getName();// 这个获取表单输入中返回的用户名;String password = (String) authentication.getCredentials();// 这个是表单中输入的密码;// 这里构建来判断用户是否存在和密码是否正确UserInfo userInfo = (UserInfo) userDetailService.loadUserByUsername(userName); // 这里调用我们的自己写的获取用户的方法;if (userInfo == null) {throw new BadCredentialsException("用户名不存在");}// //这里我们还要判断密码是否正确,实际应用中,我们的密码一般都会加密,以Md5加密为例// Md5PasswordEncoder md5PasswordEncoder=new Md5PasswordEncoder();// //这里第个参数,是salt// 就是加点盐的意思,这样的好处就是用户的密码如果都是123456,由于盐的不同,密码也是不一样的,就不用怕相同密码泄漏之后,不会批量被破解。// String encodePwd=md5PasswordEncoder.encodePassword(password, userName);// //这里判断密码正确与否// if(!userInfo.getPassword().equals(encodePwd))// {// throw new BadCredentialsException("密码不正确");// }// //这里还可以加一些其他信息的判断,比如用户账号已停用等判断,这里为了方便我接下去的判断,我就不用加密了。////if (!userInfo.getPassword().equals(password )) {throw new BadCredentialsException("密码不正确");}Collection authorities = userInfo.getAuthorities();// 构建返回的用户登录成功的tokenreturn new UsernamePasswordAuthenticationToken(userInfo, password, authorities);}@Overridepublic boolean supports(Class authentication) {// TODO Auto-generated method stub// 这里直接改成retrun true;表示是支持这个执行return true;}
}
到此为止,我们的用户信息的获取,校验部分已经完成了。接下来要让它起作用,则我们需要在配置文件中修改,让他起作用。回到我的代码文件,修改如下:
1、注入我们自己的er
2、修改配置的方法:
    @Autowiredprivate AuthenticationProvider provider;  //注入我们自己的AuthenticationProvider@Overrideprotected void configure(AuthenticationManagerBuilder auth) throws Exception {// TODO Auto-generated method stubauth.authenticationProvider(provider);//        auth
//        .inMemoryAuthentication()
//            .withUser("admin").password("123456").roles("USER")
//            .and()
//            .withUser("test").password("test123").roles("ADMIN");}
现在重新运行程序,则需要输入用户名为 admin 密码是之后,才能正常登录了。
为了方便测试,我们调整添加另一个控制器 /whoim 的代码 ,让他返回当前登录的用户信息,前面说了,他是存在r 的全局变量中,所以我们可以这样获取
@RequestMapping("/whoim")public Object whoIm(){return SecurityContextHolder.getContext().getAuthentication().getPrincipal();}
我们运行,直接反问 /whoim ,则直接跳转到登录页面,我们验证过之后,再访问此url,结果如下:
image.png
改造3、自定义登录成功和失败的处理逻辑
在现在的大多数应用中,一般都是前后端分离的,所以我们登录成功或失败都需要用json格式返回,或者登录成功之后,跳转到某个具体的页面。
接下来我们来实现这种改造。
为了实现这个功能,我们需要写2个类,分别继承ndler和个类,并重写其中的部分方法即可。
处理登录成功的:
@Component("myAuthenticationSuccessHandler")
public class MyAuthenticationSuccessHandler extends SavedRequestAwareAuthenticationSuccessHandler{@Autowiredprivate ObjectMapper objectMapper;@Overridepublic void onAuthenticationSuccess(HttpServletRequest request, HttpServletResponse response, Authentication authentication)throws IOException, ServletException {            //什么都不做的话,那就直接调用父类的方法//super.onAuthenticationSuccess(request, response, authentication);  //这里可以根据实际情况,来确定是跳转到页面或者json格式。//如果是返回json格式,那么我们这么写Map map=new HashMap<>();map.put("code", "200");map.put("msg", "登录成功");response.setContentType("application/json;charset=UTF-8");response.getWriter().write(objectMapper.writeValueAsString(map));//如果是要跳转到某个页面的,比如我们的那个whoim的则//new DefaultRedirectStrategy().sendRedirect(request, response, "/whoim");}
}
登录失败的:
@Component("myAuthenticationFailHander")
public class MyAuthenticationFailHander extends SimpleUrlAuthenticationFailureHandler {@Autowiredprivate ObjectMapper objectMapper;private Logger logger = LoggerFactory.getLogger(getClass());@Overridepublic void onAuthenticationFailure(HttpServletRequest request, HttpServletResponse response,AuthenticationException exception) throws IOException, ServletException {// TODO Auto-generated method stublogger.info("登录失败");//以Json格式返回Map map=new HashMap<>();map.put("code", "201");map.put("msg", "登录失败");response.setStatus(HttpStatus.INTERNAL_SERVER_ERROR.value());response.setContentType("application/json");response.setCharacterEncoding("UTF-8");   response.getWriter().write(objectMapper.writeValueAsString(map));}
}
代码完成之后,修改配置类代码。
添加2个注解,自动注入
@Autowiredprivate AuthenticationSuccessHandler myAuthenticationSuccessHandler;@Autowiredprivate AuthenticationFailureHandler myAuthenticationFailHander;@Overrideprotected void configure(HttpSecurity http) throws Exception {// TODO Auto-generated method stub//super.configure(http);http.formLogin().loginPage("/login").loginProcessingUrl("/login/form").successHandler(myAuthenticationSuccessHandler).failureHandler(myAuthenticationFailHander).permitAll() //表单登录,permitAll()表示这个不需要验证 登录页面,登录失败页面.and().authorizeRequests().anyRequest().authenticated() .and().csrf().disable(); }
进行测试,成功返回json格式的(登录成功和失败的)
改造4、添加权限控制
之前的代码我们用户的权限没有加以利用,现在我们添加权限的用法。
之前的登录验证通俗的说,就是来判断你是谁(认证),
而权限控制就是用来确定:你能做什么或者不能做什么(权限)
在讲这个之前,我们简单说下,对于一些资源不需要权限认证的,那么就可以在中添加 过滤条件,如:
@Overrideprotected void configure(HttpSecurity http) throws Exception {// TODO Auto-generated method stub//super.configure(http);http.formLogin().loginPage("/login").loginProcessingUrl("/login/form").successHandler(myAuthenticationSuccessHandler).failureHandler(myAuthenticationFailHander).permitAll() //表单登录,permitAll()表示这个不需要验证 登录页面,登录失败页面.and().authorizeRequests().antMatchers("/index").permitAll() //这就表示 /index这个页面不需要权限认证,所有人都可以访问.anyRequest().authenticated() .and().csrf().disable(); }
那么我们直接访问 /index 就不会跳转到登录页面,这样我们就可以把一些不需要验证的资源以这种方式过滤,比如图片,脚本,样式文件之类的。
我们先来看第一种权限控制:在编码中写死的。
其实权限控制也是通过这种方式来实现:
http.formLogin().loginPage("/login").loginProcessingUrl("/login/form").successHandler(myAuthenticationSuccessHandler).failureHandler(myAuthenticationFailHander).permitAll() //表单登录,permitAll()表示这个不需要验证 登录页面,登录失败页面.and().authorizeRequests().antMatchers("/index").permitAll() .antMatchers("/whoim").hasRole("ADMIN") //这就表示/whoim的这个资源需要有ROLE_ADMIN的这个角色才能访问。不然就会提示拒绝访问.anyRequest().authenticated() //必须经过认证以后才能访问 .and().csrf().disable();
这个用户的角色哪里来,就是我们自己的中返回的用户信息中的角色权限信息,
这里需要注意一下就是 .("ADMIN"),那么给用户的角色时就要用:

. 这里也可以限定的不同要求不同的权限(适用于风格的API).
如:Post需要 管理员权限,get 需要user权限,我们可以这么个改造,同时也可以通过通配符来是实现 如:/user/1 这种带参数的URL
.("/whoim").("ADMIN")
.(.POST,"/user/").("ADMIN")
.(.GET,"/user/").("USER")
的校验的原理:左手配置信息,右手登录后的用户信息,中间投票器。
从我们的配置信息中获取相关的URL和需要的权限信息,然后获得登录后的用户信息,
然后经过:r 来验证,这里面有多个投票器:,(默认有几种实现:比如:1票否决(只要有一个不同意,就没有权限),全票通过,才算通过;只要有1个通过,就全部通过。类似这种的。
是 默认提供的的web开发的投票器。(表达式的投票器)
默认的是 只要有一个通过,就通过。
有兴趣的可以 从eptor这个过滤器入口,来查看这个流程。
内嵌的表达式有: 等等。
每一个权限表达式都对应一个方法。
如果需要同时满足多个要求的,不能连写如 ,我们有个URL需要管理员权限也同时要限定IP的话,不能:.("ADMIN").("192.168.1.1");
而是需要用方法 .("('ADMIN') and ('192.168.1.1')");这种。
那我们可以自己写权限表达式吗? 可以,稍后。。。这些都是硬编码的实现,都是在代码中写入的,这样的灵活性不够。所以我们接下来继续改造
改造4、添加基于RBAC(role-Based- )权限控制
这个大家可以去百度一下,一般都是由 3个部分组成,一个是用户,一个是角色 ,一个是资源(菜单,按钮),然后就是 用户和角色的关联表,角色和资源的关联表
核心就是判断当前的用户所拥有的URL是否和当前访问的URL是否匹配。
首先我们自己提供一个判断的接口和实现,代码如下:
/*** 返回权限验证的接口*/
public interface RbacService {boolean hasPermission(HttpServletRequest request,Authentication authentication);
}@Component("rbacService")
public class RbacServiceImpl implements RbacService {private AntPathMatcher antPathMatcher = new AntPathMatcher();@Overridepublic boolean hasPermission(HttpServletRequest request, Authentication authentication) {Object principal = authentication.getPrincipal();boolean hasPermission = false;if (principal instanceof UserDetails) { //首先判断先当前用户是否是我们UserDetails对象。String userName = ((UserDetails) principal).getUsername();Set urls = new HashSet<>(); // 数据库读取 //读取用户所拥有权限的所有URLurls.add("/whoim");// 注意这里不能用equal来判断,因为有些URL是有参数的,所以要用AntPathMatcher来比较for (String url : urls) {if (antPathMatcher.match(url, request.getRequestURI())) {hasPermission = true;break;}}}return hasPermission;}
}
然后在的配置项中添加自定义的权限表达式就可以了。
@Overrideprotected void configure(HttpSecurity http) throws Exception {// TODO Auto-generated method stub//super.configure(http);http.formLogin().loginPage("/login").loginProcessingUrl("/login/form").successHandler(myAuthenticationSuccessHandler).failureHandler(myAuthenticationFailHander).permitAll()  //表单登录,permitAll()表示这个不需要验证 登录页面,登录失败页面.and().authorizeRequests()
//                      .antMatchers("/index").permitAll()
//                .antMatchers("/whoim").hasRole("ADMIN")
//                .antMatchers(HttpMethod.POST,"/user/*").hasRole("ADMIN")
//                .antMatchers(HttpMethod.GET,"/user/*").hasRole("USER").anyRequest().access("@rbacService.hasPermission(request,authentication)")    //必须经过认证以后才能访问            .and().csrf().disable();            }
其中 @ 就是我们自己声明的bean,在实现类的头部注解中。
改造5、记住我的功能 me
本质是通过token来读取用户信息,所以服务端需要存储下token信息
根据官方的文档,token可以通过数据库存储 数据库脚本
CREATE TABLE persistent_logins (username VARCHAR(64) NOT NULL,series VARCHAR(64) NOT NULL,token VARCHAR(64) NOT NULL,last_used TIMESTAMP NOT NULL,PRIMARY KEY (series)
);
然后,配置好token 的存储 及数据源
@Autowiredprivate DataSource dataSource; //是在application.properites/*** 记住我功能的token存取器配置* @return*/@Beanpublic PersistentTokenRepository persistentTokenRepository() {JdbcTokenRepositoryImpl tokenRepository = new JdbcTokenRepositoryImpl();tokenRepository.setDataSource(dataSource);return tokenRepository;}
修改配置
  @Overrideprotected void configure(HttpSecurity http) throws Exception {// TODO Auto-generated method stub//super.configure(http);http.formLogin().loginPage("/login").loginProcessingUrl("/login/form").successHandler(myAuthenticationSuccessHandler).failureHandler(myAuthenticationFailHander).permitAll()  //表单登录,permitAll()表示这个不需要验证 登录页面,登录失败页面.and().rememberMe().rememberMeParameter("remember-me").userDetailsService(userDetailsService).tokenRepository(persistentTokenRepository()).tokenValiditySeconds(60).and().authorizeRequests()
//                      .antMatchers("/index").permitAll()
//                .antMatchers("/whoim").hasRole("ADMIN")
//                .antMatchers(HttpMethod.POST,"/user/*").hasRole("ADMIN")
//                .antMatchers(HttpMethod.GET,"/user/*").hasRole("USER").anyRequest().access("@rbacService.hasPermission(request,authentication)")    //必须经过认证以后才能访问            .and().csrf().disable();
在登陆页面login.html上还要加上记住密码的勾选框
记住我 登录之后 数据库就会有一条数据
image.png
然后,服务重新启动下,我们在看下直接访问 /whoim 的话,就可以直接访问了,不需要再登录了。
到此为止我们的 的基本用法已经改造完成了。
参考文章
boot 中 使用改造5部曲
+ 基本使用及个性化登录配置
Hello with Boot