ubutu的Realsense摄像头的环境配置的报错解决(个人认为官方文档存在问
支持多种语言进行开发,因为之前学过,所以计划使用进行相关的项目开发,由于没带摄像头回家,所以使用了官方的视频流进行测试,以下是Realsense的环境配置及Pycharm相关的库函数安装说记录
SDK的下载
1、首先要在Real Sense官网上下载SDK的安装包
点击,然后点击SDK2.0
下载SDK
滑到最下方 ,Linux系统要点击这个源码包进行编译,系统下载上面的exe就好
下载完成后,将其拖动到虚拟机页面中,点击提取到此处,然后可以将解压过后的文件放入其他路径中,这个看个人习惯。
2、右击该文件,在终端打开
2、 按照官方说明进行编译
注意:官方说明存在漏洞,有几个驱动包的安装命令没有写在上面,如果直接按照官方命令的话会报错,所以需要在该文件终端输入以下命令,再按照官方文档来。
sudo apt-get install librealsense2-dkms
sudo apt-get install librealsense2-utils
sudo apt-get install librealsense2-dev
sudo apt-get install librealsense2-dbg
如果嫌看起来麻烦的话,可以复制后在word文档中将其翻译为中文副本,方便查看
注意:要看清楚每个命令前的说明,有很多都是其他版本或者内核的命令,顺序很重要,不要跳着来,前面如果报错要先解决它,不然到关键步骤的时候会因为缺少依赖项而报一些很莫名其妙的错误。
比如这里,我用的是18.04,如果有其他版本的话就使用其他的命令就好
还有这里也是,看清楚自己的版本和内核
至于CMake的话可以在ubuntu的软件商店上下载,或者直接到CMake官网上下载,网上教程很多,可以自行参考。
以下是我的.04使用的全部命令
#记得先右击该文件打开终端sudo apt-key adv --keyserver keys.gnupg.net --recv-key F6E65AC044F831AC80A06380C8B3A55A6F3EFCDE || sudo apt-key adv --keyserver hkp://keyserver.ubuntu.com:80 --recv-key F6E65AC044F831AC80A06380C8B3A55A6F3EFCDEsudo add-apt-repository "deb http://realsense-hw-public.s3.amazonaws.com/Debian/apt-repo xenial main" -usudo apt-get install librealsense2-dkms
sudo apt-get install librealsense2-utils
sudo apt-get install librealsense2-dev
sudo apt-get install librealsense2-dbg
sudo apt-get update && sudo apt-get upgrade && sudo apt-get dist-upgrade
sudo update-grub && sudo reboot
sudo apt-get install git libssl-dev libusb-1.0-0-dev pkg-config libgtk-3-dev
sudo apt-get install libglfw3-dev libgl1-mesa-dev libglu1-mesa-dev
sudo cp config/99-realsense-libusb.rules /etc/udev/rules.d/
sudo udevadm control --reload-rules && udevadm trigger
./scripts/patch-realsense-ubuntu-lts.sh
mkdir build && cd build
cmake ../
DCMAKE_BUILD_TYPE=Release
cmake ../ -DBUILD_EXAMPLES=true
sudo make uninstall && make clean && make && sudo make install
realsense-viewer
如果上面命令出现问题,也可以参考这个文档
3、pycharm专业版的下载
到P官网上下载安装包,然后同样将其拖入虚拟机页面中,右键提取到此处。
具体操作可以参考此教程,注意:配置环境变量时自己的路径和教程中的路径是不一样的,先打开终端,输入pwd查看下自己的路径再配置。以及如果想激活pycharm又不想掏100块的话,可以直接去淘宝上买一个破解插件,教程很简单,而且只要7块钱,不需要去修改host文件,当然也可以去网上找激活码,不过个人感觉用网上的激活码太麻烦,所以这里不推荐。
4、开发的常用库下载
配置完路径之后在命令行输入.sh,即可打开
新建一个项目后,点击左上角文件中的设置
然后点击项目 中的解释器
点这个加号,然后搜索自己需要的软件包,开发Real Sense常用的软件包有,2;numpy;CV2以及open3d;这些都可以提前下载到项目中,在下载open3d的时候可能会报错,可以升级一些pip软件包,(直接搜索pip,然后在指定版本那里勾选更高的版本下载),不过这么做可能会造成的pip命令与当前版本不适配,后面调回来就好。
官方代码测试
1.还是在下方,点击
然后下拉选择自己想要用于开发的语言,这里我选的是
每个例子都有对应的作用解释,点击后可以看到代码,上面都有英文注释
插上设备后在中输入测试代码
注意:要先下载;numpy;cv2三个软件包,否则将会报错
## License: Apache 2.0. See LICENSE file in root directory.
## Copyright(c) 2017 Intel Corporation. All Rights Reserved.#####################################################
##              Align Depth to Color               ##
###################################################### First import the library
import pyrealsense2 as rs
# Import Numpy for easy array manipulation
import numpy as np
# Import OpenCV for easy image rendering
import cv2# Create a pipeline
pipeline = rs.pipeline()# Create a config and configure the pipeline to stream
#  different resolutions of color and depth streams
config = rs.config()# Get device product line for setting a supporting resolution
pipeline_wrapper = rs.pipeline_wrapper(pipeline)
pipeline_profile = config.resolve(pipeline_wrapper)
device = pipeline_profile.get_device()
device_product_line = str(device.get_info(rs.camera_info.product_line))found_rgb = False
for s in device.sensors:if s.get_info(rs.camera_info.name) == 'RGB Camera':found_rgb = Truebreak
if not found_rgb:print("The demo requires Depth camera with Color sensor")exit(0)config.enable_stream(rs.stream.depth, 640, 480, rs.format.z16, 30)if device_product_line == 'L500':config.enable_stream(rs.stream.color, 960, 540, rs.format.bgr8, 30)
else:config.enable_stream(rs.stream.color, 640, 480, rs.format.bgr8, 30)# Start streaming
profile = pipeline.start(config)# Getting the depth sensor's depth scale (see rs-align example for explanation)
depth_sensor = profile.get_device().first_depth_sensor()
depth_scale = depth_sensor.get_depth_scale()
print("Depth Scale is: " , depth_scale)# We will be removing the background of objects more than
#  clipping_distance_in_meters meters away
clipping_distance_in_meters = 1 #1 meter
clipping_distance = clipping_distance_in_meters / depth_scale# Create an align object
# rs.align allows us to perform alignment of depth frames to others frames
# The "align_to" is the stream type to which we plan to align depth frames.
align_to = rs.stream.color
align = rs.align(align_to)# Streaming loop
try:while True:# Get frameset of color and depthframes = pipeline.wait_for_frames()# frames.get_depth_frame() is a 640x360 depth image# Align the depth frame to color framealigned_frames = align.process(frames)# Get aligned framesaligned_depth_frame = aligned_frames.get_depth_frame() # aligned_depth_frame is a 640x480 depth imagecolor_frame = aligned_frames.get_color_frame()# Validate that both frames are validif not aligned_depth_frame or not color_frame:continuedepth_image = np.asanyarray(aligned_depth_frame.get_data())color_image = np.asanyarray(color_frame.get_data())# Remove background - Set pixels further than clipping_distance to greygrey_color = 153depth_image_3d = np.dstack((depth_image,depth_image,depth_image)) #depth image is 1 channel, color is 3 channelsbg_removed = np.where((depth_image_3d > clipping_distance) | (depth_image_3d <= 0), grey_color, color_image)# Render images:#   depth align to color on left#   depth on rightdepth_colormap = cv2.applyColorMap(cv2.convertScaleAbs(depth_image, alpha=0.03), cv2.COLORMAP_JET)images = np.hstack((bg_removed, depth_colormap))cv2.namedWindow('Align Example', cv2.WINDOW_NORMAL)cv2.imshow('Align Example', images)key = cv2.waitKey(1)# Press esc or 'q' to close the image windowif key & 0xFF == ord('q') or key == 27:cv2.destroyAllWindows()break
finally:pipeline.stop()
此示例展示通过将深度图像对准到彩色图像并执行简单的计算来表明通过对彩色图像进行简单的计算来执行背景移除的方法。
如果没带摄像头也可以采用官方录好的视频进行测试,看看自己配置的环境是否正确,这里我选的是第二个,
首先在官网上下载样例,可以任选,点击对应的图片下载,然后将其拖入虚拟机页面中,右键提取到此处
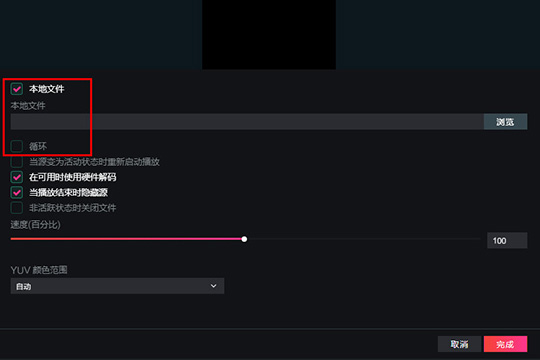
然后打开命令行,输入-,出现如下页面,将上面解压好的文件拖入-的页面中,即可播放深度视频流,以下是实际效果
切换为2D
并且当鼠标移到任意一个像素点上时,它都可以显示对应的三维坐标