会画画的乌龟
Guile 是一种 方言的编译器,我们将这种 方言也称为 Guile。Guile 是为增强 GNU 项目的扩展性而开发的。GNU 项目开发者可以将 Guile 解释器嵌入自己的程序中,从而使得自己的程序能够支持脚本扩展。本文取材于 Guile 官方的一篇教程,讲述一个具有绘图功能的 C 程序如何与 Guile 结合以获得脚本扩展能力。
线性插值
两点确定一条直线。假设直线 $C$ 过 $P$ 与 $Q$ 两点,其参数方程为:
$$C(t) = P + t(Q-P)$$
上述方程可变形为:
$$C(t) = (1-t)P + tQ$$
这就是线性插值公式。
可以使用 将线性插值的结果显示出来。 是一款命令行交互式绘图软件。用它可以绘制二维与三维的数据或函数图形,也可以用于解决一些数值分析问题,例如曲线/曲面逼近方面的问题。
如果系统是 Linux,并且已安装了 ,在终端中输入 命令便可进入 命令式交互绘图环境:
$ gnuplotG N U P L O TVersion 5.0 patchlevel 3 (Gentoo revision r0) last modified 2016-02-21 Copyright (C) 1986-1993, 1998, 2004, 2007-2016Thomas Williams, Colin Kelley and many othersgnuplot home: http://www.gnuplot.infofaq, bugs, etc: type "help FAQ"immediate help: type "help" (plot window: hit 'h')Terminal type set to 'x11'
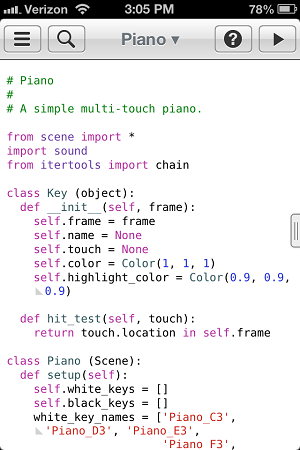
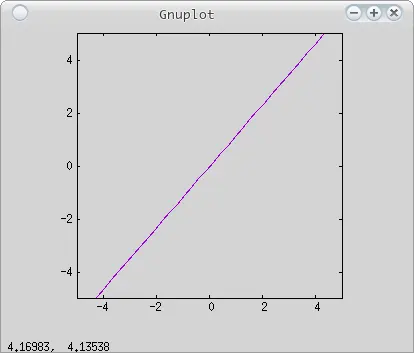
gnuplot>能够绘制参数方程的图形,它所接受的参数方程是基于维度分量的拆分形式。例如,要绘制过点 $P(0.0, 0.0)$ 与 $Q(2.71, 3.14)$ 的直线,可使用下面这条绘图命令:
plot (1-t)*0.0 + t*2.71, (1-t)*0.0 + t*3.14不过,当你在 命令式交互绘图环境中输入上述绘图命令时, 会抱怨:
undefined variable: t这是因为 默认开启的是非参数方程形式的绘制模式。使用 set 命令开启参数方程模式,然后便可基于参数方程绘制图形:
set parametric
plot (1-t)*0.0 + t*2.71, (1-t)*0.0 + t*3.14结果如下图所示:
set 规定,对于单参数方程(可表示曲线),参数为 t,而对于双参数方程(可表示曲面),参数为 u 与 v。注意,set 命令只需使用一次,后续的 plot 命令便都以参数方程模式绘制图形。也就是说,每次使用 plot 命令绘图时,不需要重复执行 set 。
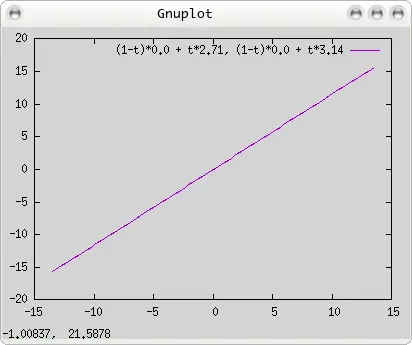
默认开启了图例说明,即位于图框内部右上方的文字与图例。如果不需要它,可以在 plot 命令中通过参数 将其关闭:
plot (1-t)*0.0 + t*2.71, (1-t)*0.0 + t*3.14 notitle结果如下图所示:
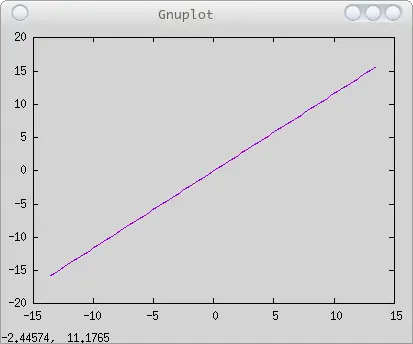
也许你已经注意到了,图框的实际宽高比(并非图框上的标称宽高比)与窗口的宽高比相等,这是 的默认设定。这意味着,当你拉长或圧扁窗口,图框也会相应的被拉长或圧扁。可使用 set size ratio -1 命令将图框的宽高比限定为标称宽高比:
set size ratio -1
plot (1-t)*0.0 + t*2.71, (1-t)*0.0 + t*3.14 notitle
结果如下图所示:
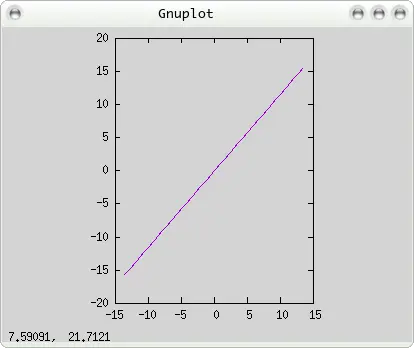
图框上标记的坐标刻度 自动生成的,如果我们想限定横向与纵向的坐标范围,例如限定在 [-5, 5] 区间,可使用 set [x|y]range 命令:
set xrange [-5:5]
set yrange [-5:5]
plot (1-t)*0.0 + t*2.71, (1-t)*0.0 + t*3.14 notitle
结果如下图所示:
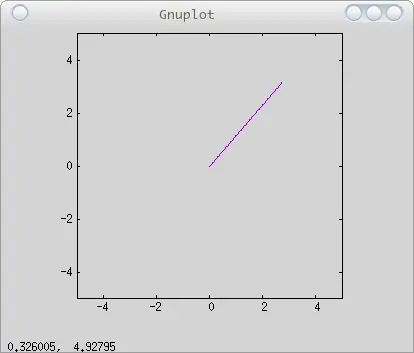
若希望绘制的是以 $P(0.0, 0.0)$ 与 $Q(2.71, 3.14)$ 为端点的直线段,可通过调整参数 t 的取值范围来实现:
set trange [0:1]
plot (1-t)*0.0 + t*2.71, (1-t)*0.0 + t*3.14 notitle
结果如下图所示:
上面的示例中,只绘制了一条直线。要是连续使用 plot 绘制两条不同的直线会怎样?例如:
plot (1-t)*0.0 + t*2.71, (1-t)*0.0 + t*3.14 notitle
plot (1-t)*0.0 + t*3.14, (1-t)*0.0 + t*2.71 notitle
结果只显示第 2 条 plot 命令的绘图结果。因为 默认会让新的 plot 命令会刷掉旧的 plot 命令的绘图结果。要想实现多条 plot 命令绘图结果的叠加,需要使用 set 命令开启图形叠加模式:
set multiplot
plot (1-t)*0.0 + t*2.71, (1-t)*0.0 + t*3.14 notitle
plot (1-t)*0.0 + t*3.14, (1-t)*0.0 + t*2.71 notitle
结果如下图所示:

要在限定横向与纵向坐标范围,并且限定参数范围的情况下绘制无图例说明的叠加图形,所需的绘图命令汇总如下:
set multiplot
set parametric
set size ratio -1
set xrange [-5:5]
set yrange [-5:5]
set trange [0:1]
plot (1-t)*0.0 + t*2.71, (1-t)*0.0 + t*3.14 notitle
plot (1-t)*0.0 + t*3.14, (1-t)*0.0 + t*2.71 notitle
管道
如果将上一节最后给出的那段 命令存放在一份文件中, 例如 foo.gp,那么通过管道,将 foo.gp 中的内容传递给 ,结果会发生什么?
$ cat foo.gp | gnuplot结果会出现一个转瞬即逝的绘图窗口。
要想让这个绘图窗口持久的存在,要么使用下面的命令:
$ cat foo.gp | gnuplot --persist要么就在 foo.gp 文件的首部增加以下命令:
set terminal x11 persist然后:
$ cat foo.gp | gnuplot在 C 程序中,也可以借助多进程编程与管道通信技术,将绘图命令传递于 :
/* foo.c */
#include
#include
#include
int
main(int argc, char **argv) {int plot_pipe[2];pipe(plot_pipe);if (fork() == 0) {close(plot_pipe[1]);dup2(plot_pipe[0], STDIN_FILENO);execlp("gnuplot", NULL, NULL);} else {char *cmds = "set terminal x11 persist\n""set multiplot\n""set parametric\n""set size ratio -1\n""set xrange [-5:5]\n""set yrange [-5:5]\n""set trange [0:1]\n""plot (1-t)*0.0 + t*2.71, (1-t)*0.0 + t*3.14 notitle\n""plot (1-t)*0.0 + t*3.14, (1-t)*0.0 + t*2.71 notitle\n";close(plot_pipe[0]);FILE *output = fdopen(plot_pipe[1], "w");fprintf(output, "%s", cmds);fflush(output);}exit(EXIT_SUCCESS);
}
上述代码中的 else 分支中的代码,相当于 cat foo.gp | 中的 cat foo.gp 部分,而 if 分支中的代码则相当于 部分。之所以能出现这种奇异的效果,归功于 fork 函数。
fork 函数可以从当前正在运行的程序(主进程)中分裂出一个新的正在运行的程序(新进程),这个过程有点像细胞的分裂。对于新进程,fork 函数返回值为 0,而对于主进程,fork 函数的返回值是那个分裂出来的新进程的 ID。由于我们的程序中没有用到新进程的 ID,所以这个问题就不多说了。若对这个话题感兴趣,可以去找 Linux 多进程编程的资料来看。
新进程通过 函数开启了 进程,然后它就死了, 进程取代了它。 进程等待我们向它输入绘图命令。但是,我们的主进程与 进程彼此独立,二者需要一种通信机制来传递信息。这种通信机制就是管道。
pipe 函数创建管道。在上例中, 数组便是管道,[0] 是其输入端,[1] 是其输出端。在主进程中,我们向 [1] 写入绘图命令,而 进程则通过读取 [0] 来获得绘图命令。由于主进程用不到 [1],所以需要将其关闭。同理, 进程也用不到 [0],所以也需要将其关闭。
dup2 函数用于文件重定向。dup2([0], ) 表示将管道的输入端重定向到系统的标准输入文件(即 stdin)。由于 具备从标准输入文件中获取信息的能力,所以这一切非常默契。
编译并运行这个 C 程序的命令如下:
$ gcc foo.c -o foo
$ ./foo这是一只会画画的乌龟,它爬行的轨迹就是它画的画。这个梗来自早期的一种面向儿童的编程语言——LOGO 语言。孩子们可以通过程序控制一只乌龟的运动,让它画出图案。现在,我们可以用 C 编写一个会画画的乌龟程序,所用的技术与工具在上文中都已经提到了。这真是个冗长的开始,直到此处,我们依然未触及本文的主题。
首先定义乌龟的活动空间:
typedef struct {FILE *plot_pipe;double west;double east;double south;double north;
} Land;static Land *
init_land(double west, double east, double south, double north) {int tube[2];pipe(tube);if (fork() == 0) {close(tube[1]);dup2(tube[0], STDIN_FILENO);execlp("gnuplot", NULL, NULL);return NULL;} else {close(tube[0]);Land *land = malloc(sizeof(Land));land->east = east;land->west = west;land->south = south;land->north = north;land->plot_pipe = fdopen(tube[1], "w");char *cmds = "set terminal x11 persist\n""set multiplot\n""set size ratio -1\n""set parametric\n""set trange [0:1]\n";assert(land->plot_pipe);fprintf(land->plot_pipe, "%s", cmds);fprintf(land->plot_pipe, "set xrange [%lf:%lf]\n", west, east);fprintf(land->plot_pipe, "set yrange [%lf:%lf]\n", south, north);fflush(land->plot_pipe);return land;}
}
然后定义乌龟:
typedef struct {double x;double y;double direction;Land *land;
} Tortoise;static Tortoise *
tortoise_alloc(Land *land) {Tortoise *t = malloc(sizeof(Tortoise));t->x = t->y = t->direction = 0.0;t->land = land;return t;
}static void
tortoise_reset(Tortoise *self) {self->x = self->y = self->direction =  0.0;
}
x 与 y 表示乌龟在 Land 中的位置。 表示乌龟前进的方向。land 指向乌龟的活动空间。
乌龟只需要用上文提到的线性插值方法就可以在 图框内绘制出它的行走轨迹。只要给出乌龟爬行轨迹上的两个点,便可用线性插值的办法,通过一组首尾相接的直线段描绘出乌龟的爬行轨迹。我们将最基本的绘图操作定义为 函数:
static void
draw_line(Land *land, double x0, double y0, double x1, double y1) {FILE *output = land->plot_pipe;if (x0 < land->west || x0 > land->east) return;if (y0 < land->south || y0 > land->north) return;if (x1 < land->west || x1 > land->east) return;if (y1 < land->south || y1 > land->north) return;fprintf (output,"plot [0:1] (1-t) * %lf + t * %lf, (1-t) * %lf + t * %lf notitle\n",x0, x1, y0, y1);fflush (output);
}
下面代码定义了乌龟的一些基本行为:
static void
tortoise_reset(Tortoise *self) {self->x = self->y = self->direction = 0.0;
}static void
tortoise_turn(Tortoise *self, double degree) {self->direction += M_PI / 180.0 * degree;
}static void
tortoise_forward(Tortoise *self, double distance, bool to_mark) {double newX, newY;newX = self->x + distance * cos (self->direction);newY = self->y + distance * sin (self->direction);if (to_mark) {draw_line (self->land, self->x, self->y, newX, newY);}self->x = newX;self->y = newY;
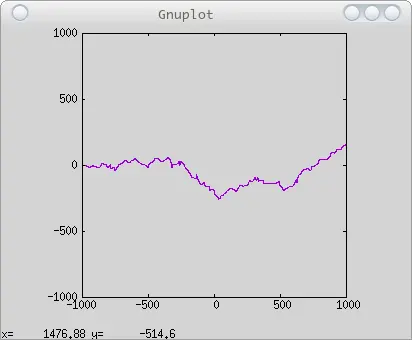
}下面试试这个乌龟能不能胜任画图的任务:
static unsigned int
generate_random_seed_in_linux(void) {unsigned int seed;FILE *fs_p = fopen("/dev/urandom", "r");fread(&seed, sizeof(unsigned int), 1, fs_p);fclose(fs_p);return seed;
}
int
main(void) {double r = 1000.0;Land *land = init_land(-r, r, -r, r);Tortoise *t = tortoise_alloc(land);/* 让乌龟随机爬行 */{tortoise_turn(t, 180.0);tortoise_forward(t, 1000, false);tortoise_turn(t, -180.0);srand(generate_random_seed_in_linux());double old_direction = 90.0;for (int i = 0; i < 200; i++) {double direction = rand() % 180;tortoise_forward(t, 30.0, true);tortoise_turn(t, direction - old_direction);old_direction = direction;}}free(t);fclose(land->plot_pipe);return 0;
}
要让上述代码通过编译,需要包含以下头文件:
#include
#include
#include
#include
#include
#include
#include
编译命令为:
$ gcc -lm tortoise.c -o tortoise程序运行结果类似下图(受 渲染机制的限制,绘图速度不是那么快):
C 程序与 Guile 的结合
上文我们所做的事虽然有趣,但它仅仅是个冗长的前奏。现在刚开始步入正题,对于上一节所写的 C 程序,如何将其与 Guile 相结合以获得脚本扩展能力。为了便于清晰完整的呈现主题,现在假设 Land 里只有一只乌龟。也就是说,我们将定义一个全局变量来表示这只乌龟。
Tortoise *lonely_tortoise = NULL;基于这个全局变量,就可以将上一节所实现的 , 以及 这三个函数封装为更简单的形式,使它们能够嵌入 Guile 环境:
static SCM
guile_tortoise_reset(void) {tortoise_reset(lonely_tortoise);return SCM_UNSPECIFIED;
}static SCM
guile_tortoise_turn(SCM scm_degree) {double degree = scm_to_double(scm_degree);tortoise_turn(lonely_tortoise, degree);return SCM_UNSPECIFIED;
}static SCM
guile_tortoise_forward(SCM scm_distance, SCM scm_to_mark) {double distance = scm_to_double(scm_distance);bool to_mark = scm_to_bool(scm_to_mark);tortoise_forward(lonely_tortoise, distance, to_mark);return SCM_UNSPECIFIED;
}
然后为这三个函数登籍造册,让它们以后能接受 Guile 的管理:
static void *
register_functions_into_guile(void *data) {scm_c_define_gsubr("tortoise-reset", 0, 0, 0, guile_tortoise_reset);scm_c_define_gsubr("tortoise-turn", 1, 0, 0, guile_tortoise_turn);scm_c_define_gsubr("tortoise-forward", 2, 0, 0, guile_tortoise_forward);return NULL;
}
是一个回调函数,需要将其传递给 函数,才能完成上述 C 函数在 Guile 环境中的注册:
scm_with_guile (®ister_functions_into_guile, NULL);一旦将 C 函数注册到 Guile 环境,那么在 Guile 解释器运行期间,可以在 Guile 解释器或 Guile 脚本中使用这些函数的名字(例如,-)来调用它们。 函数可用于在 C 程序中开启 Guile 解释器:
int
main(int argc, char **argv) {double r = 1000.0;Land *land = init_land(-r, r, -r, r);lonely_tortoise = tortoise_alloc(land);scm_with_guile(register_functions_into_guile, NULL);scm_shell(argc, argv);free(lonely_tortoise);fclose(land->plot_pipe);return 0;
}
上述代码初始化了 land,生成了 的实体,将用于表示乌龟的行为的三个 C 函数注册到了 Guile 环境,然后运行了 Guile 解释器。
要让上述代码编译通过,需要包含 Guile 库的头文件:
#include 下面是完整的代码:
/* guile-tortoise.c */
#include
#include
#include
#include
#include
#include
#include
#include typedef struct {FILE *plot_pipe;double west;double east;double south;double north;
} Land;static Land *
init_land(double west, double east, double south, double north) {int tube[2];pipe(tube);if (fork() == 0) {close(tube[1]);dup2(tube[0], STDIN_FILENO);execlp("gnuplot", NULL, NULL);return NULL;} else {close(tube[0]);Land *land = malloc(sizeof(Land));land->east = east;land->west = west;land->south = south;land->north = north;land->plot_pipe = fdopen(tube[1], "w");char *cmds = "set terminal x11 persist\n""set multiplot\n""set size ratio -1\n""set parametric\n""set trange [0:1]\n";assert(land->plot_pipe);fprintf(land->plot_pipe, "%s", cmds);fprintf(land->plot_pipe, "set xrange [%lf:%lf]\n", west, east);fprintf(land->plot_pipe, "set yrange [%lf:%lf]\n", south, north);fflush(land->plot_pipe);return land;}
}static void
reset_land(Land *land) {fprintf (land->plot_pipe, "clear\n");fflush (land->plot_pipe);
}static void
draw_line(Land *land, double x0, double y0, double x1, double y1) {FILE *output = land->plot_pipe;if (x0 < land->west || x0 > land->east) return;if (y0 < land->south || y0 > land->north) return;if (x1 < land->west || x1 > land->east) return;if (y1 < land->south || y1 > land->north) return;fprintf (output,"plot [0:1] (1-t) * %lf + t * %lf, (1-t) * %lf + t * %lf notitle\n",x0, x1, y0, y1);fflush (output);
}typedef struct {double x;double y;double direction;Land *land;
} Tortoise;static Tortoise *
tortoise_alloc(Land *land) {Tortoise *t = malloc(sizeof(Tortoise));t->x = t->y = t->direction = 0.0;t->land = land;return t;
}static void
tortoise_reset(Tortoise *self) {self->x = self->y = self->direction =  0.0;
}static void
tortoise_turn(Tortoise *self, double degree) {self->direction += M_PI / 180.0 * degree;
}static void
tortoise_forward(Tortoise *self, double distance, bool to_mark) {double newX, newY;newX = self->x + distance * cos (self->direction);newY = self->y + distance * sin (self->direction);if (to_mark) {draw_line (self->land, self->x, self->y, newX, newY);}self->x = newX;self->y = newY;
}static unsigned int
generate_random_seed_in_linux(void) {unsigned int seed;FILE *fs_p = fopen("/dev/urandom", "r");fread(&seed, sizeof(unsigned int), 1, fs_p);fclose(fs_p);return seed;
}/*****************************************************************                           to guile****************************************************************/
Tortoise *lonely_tortoise = NULL;static SCM
guile_tortoise_reset(void) {tortoise_reset(lonely_tortoise);return SCM_UNSPECIFIED;
}static SCM
guile_tortoise_turn(SCM scm_degree) {double degree = scm_to_double(scm_degree);tortoise_turn(lonely_tortoise, degree);return SCM_UNSPECIFIED;
}static SCM
guile_tortoise_forward(SCM scm_distance, SCM scm_to_mark) {double distance = scm_to_double(scm_distance);bool to_mark = scm_to_bool(scm_to_mark);tortoise_forward(lonely_tortoise, distance, to_mark);return SCM_UNSPECIFIED;
}static void *
register_functions_into_guile(void *data) {scm_c_define_gsubr("tortoise-reset", 0, 0, 0, guile_tortoise_reset);scm_c_define_gsubr("tortoise-turn", 1, 0, 0, guile_tortoise_turn);scm_c_define_gsubr("tortoise-forward", 2, 0, 0, guile_tortoise_forward);return NULL;
}int
main(int argc, char **argv) {double r = 1000.0;Land *land = init_land(-r, r, -r, r);lonely_tortoise = tortoise_alloc(land);scm_with_guile(register_functions_into_guile, NULL);scm_shell(argc, argv);free(lonely_tortoise);fclose(land->plot_pipe);return 0;
}
编译上述代码的命令为:
$ gcc `pkg-config --cflags --libs guile-2.0` guile-tortoise.c -o guile-tortoise运行编译所得程序:
$ ./guile-tortoise
Copyright (C) 1995-2014 Free Software Foundation, Inc.Guile comes with ABSOLUTELY NO WARRANTY; for details type `,show w'.
This program is free software, and you are welcome to redistribute it
under certain conditions; type `,show c' for details.Enter `,help' for help.
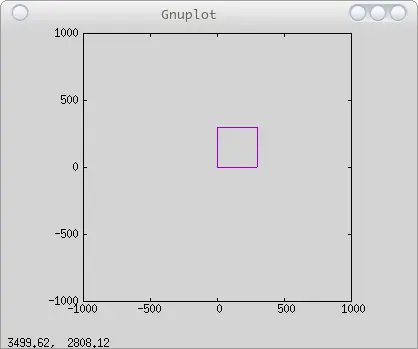
scheme@(guile-user)> 这个程序不仅会为你开启一个 的绘图窗口,同时也会进入 Guile 解释器交互环境。在这个环境里,可以使用 语言控制那只孤独的小乌龟进行绘图。例如:
> (tortoise-forward 300 #t)
> (tortoise-turn 90)
> (tortoise-forward 300 #t)
> (tortoise-turn 90)
> (tortoise-forward 300 #t)
> (tortoise-turn 90)
> (tortoise-forward 300 #t)
上述这些重复的绘制『命令』,可在 绘图窗口中交互绘制出一个矩形:
复杂的行走
Guile 是个解释器,它可以解释运行 语言。如果你对 有一定了解,那么便可以用它写脚本,用更复杂的逻辑来控制那只孤独的小乌龟绘制图案。
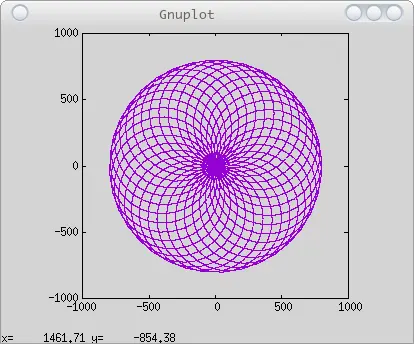
下面这份脚本可控制小乌龟在不同方位绘制一些正多边形(边数较大时,近似为圆):
;;;; circles.scm
(define (draw-polygon n r)(do ((i 0 (1+ i)))((= i n))(begin(tortoise-forward (* r (sin (* 3.14159 (/ 1 n)))) #t)(tortoise-turn (/ 360.0 n)))))(do ((i 0 (1+ i)))((= i 36))(begin(tortoise-turn 10.0)(draw-polygon 30 800)))
用上一节生成的 guile- 程序解释运行 .scm 脚本:
$ ./guile-tortoise circles.scm这些正多边形叠加到一起,可展现出复杂的景象:
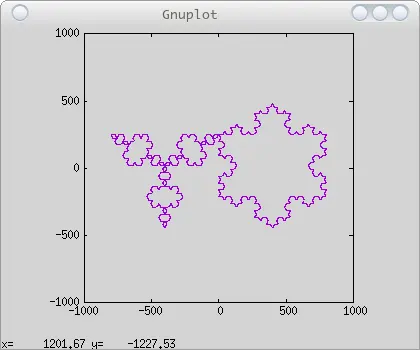
下面这份 脚本可以绘制两朵不同形状的雪花:
;;;; snowflake.scm
(define (koch-line length depth)(if (zero? depth)(tortoise-forward length #t)(let ((sub-length (/ length 3))(sub-depth (1- depth)))(for-each (lambda (angle)(koch-line sub-length sub-depth)(tortoise-turn angle))'(60 -120 60 0)))))(define (snowflake length depth sign)(let iterate ((i 1))(if (<= i 3)(begin(koch-line length depth)(tortoise-turn (* sign -120))(iterate (1+ i))))))(tortoise-turn 90)
(tortoise-forward 250 #f)
(tortoise-turn -90)(snowflake 800 3 1)
(tortoise-turn 180)
(snowflake 800 3 -1)
用 guile- 程序解释运行 .scm 脚本:
$ ./guile-tortoise snowflake.scm所得结果如下图所示:
总结
对于编程的初学者而言,这篇文章应该是有趣的。它向你展示了,不需要多么复杂的工具和编程技术,只需将功能较为单一的组件通过某些特定的机制组合起来,便可得到一个能够绘制二维图形并且具备脚本扩展功能的程序。这是不是出乎意料?
从一开始,在 中交互绘图,我们需要了解许多 的知识方能绘制线性插值结果。接下来,我们尝试在 C 程序中通过管道,向 输出绘图命令,这样我们可以很方便的使用 C 语言来操纵 了,而且我们在 C 程序中还抽象出一只会画图的小乌龟,通过控制小乌龟的爬行来绘制图形。利用 C 程序操纵 固然可绘制复杂的图案,但是每次要绘制新的图形,不得不改写并重新编译 C 程序。最后,我们在 C 程序中嵌入了 Guile 解释器,然后用 来编写绘图脚本,这样可以在保持 C 程序不变的情况下,绘制出复杂的图案。更有趣的是,在使用 语言为这个 C 程序编写绘图脚本时,我们已经不觉得 的存在了。
不过,虽然通过嵌入 Guile 解释器能够让程序拥有脚本扩展功能,但是要用好这一功能,需要对 语言有所了解。 语言很简单,尽管要用它来构建实际的程序看起来困难重重,但是我们可以用它来写一些脚本,逐步的掌握它。事实上,我们学习任何一种编程语言,在开始时,用它写实际的程序也是困难重重的。学习的过程就应该像文中的那只孤独的小乌龟那样一步一步的前进,终有所成。